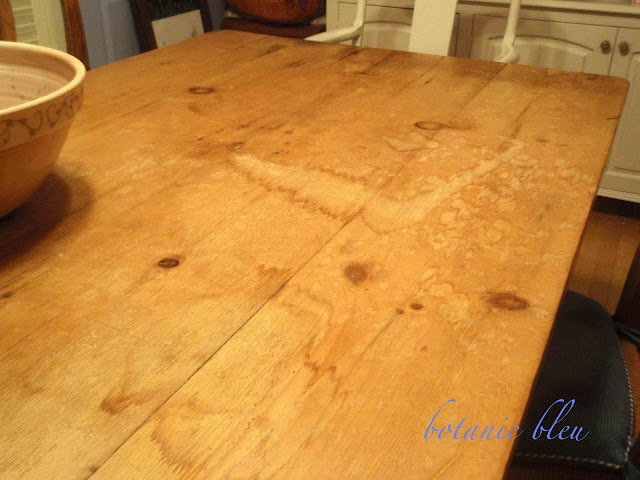
Severe water damage to my French Country style table made from reclaimed English pine boards required stripping the wax finish to sand the table top.
For me, there is a fine line between
distressed
and
damaged

Our farmhouse pine table was made from reclaimed antique English pine boards. The scrapes and marks on the table when we bought it in 1988 added to its charm and character and verified its age and previous life.
Over the years we added our own character/distress marks...
Like when the floor refinisher set our couch atop the table and dug long grooves into it with the couch's feet that had lost their protective pads.

Like the marks into the waxed finish made by pressing the grading pen really hard while grading papers. I could almost read the comments I wrote on students' papers. My handwriting was akin to what you see on aged documents. Layer upon layer of comments had a distinctive pattern, but the words were indiscernible since each day's comments were written over the top of the previous day's comments.
These character marks/distressing I could live with.
They added our lives to the table.
The water stains recently added to the table, however, were another matter. For me, they did not add character or chapters of our lives to the table.
What to do?
How do I repair the finish, but keep the mellow distressed look?
How do I keep the patina from its previous life in England and its life with us?
The table was not finished with a stain. Protective wax allowed the distressed natural grain of the wood to show through.
First, I tried sanding the water-stained areas. The waxy finish just gummed up the sandpaper. I needed to get to the original wood below the wax to sand the water stains.
Deep breath.......
I needed to remove the wax finish.
So, how do I do that? I have never done this before. How do you remove old wax? No research, no tools, no one to consult ...
Using one blade of a broken pair of scissors, I began scraping the wax off the table. I used the backside of the blade, not the sharp cutting edge.
Hours later, I was only about half way finished scraping. Keep breathing...
My arm, elbow, shoulders, and back ached.
In for a penny, in for a pound. No turning back, cannot stop now. But not on this night... tomorrow... Went to bed and began again the next day...
As I scraped the wax, I thought,
"I'm scraping dirt. Patina is really a fancy name for dirty wax. Am I ruining this table?"
After scraping began the chore of removing the water stains. Hmmm... sanding helped, but did not eliminate them completely. How about bleach? That helped remove a lot of the stains. Back to sanding some more.
More stains removed...
Here is the stripped, bleached, and sanded table.
Character, distress, and couch-dug groove still visible.
Handwriting from grading gone. (sigh)
Water stains almost eliminated. Hmmm... should I keep working?
No, the remaining stains will add another chapter of our lives to the table.
First coat of Minwax as a finish to the table... Hmmm... again... not as much patina (depth and shine) as before stripping.
Re-read directions on Minwax. Oh... buff the wax with a soft cloth.
Here is the second coat of Minwax after buffing. This is the area of the worst water stain. Looking much better...
After the third coat of Minwax and buffing... There is a definite nice looking PATINA with character (distress) still visible. Major water stains (damage) are not visible.
Oh, what a relief!
Below are photos of AFTER refinishing the table, set with the chirping birds.
Look at the patina!
This past weekend I went out-of-town antiquing with friends, and we ate lunch in the town's locally well-known barbeque cafe. A sign on the wall caught my eye.
I think it is just the quote needed for my chalkboard and pine table.
Is this a tutorial of how to refinish a pine table?
No!
Experienced furniture refinishers reading this are probably shuddering at how I did the refinish job. I think I was pretty lucky with how the table turned out.
~~~~❦~~~~
S o u r c e s
French Country Pine Table Refinish No. 2 shows how the pine table was refinished a second time due to water damage again
Pine Table - English Pine Company, Fort Worth, Texas (no longer in business)
White Chirping Bird small plates - Home Goods, several years ago


